
Part 2: Streaming Responses with Laravel Stream React
In this installment, we’ll upgrade our Laravel application to use streaming responses. This means we’ll send the AI’s response to the browser in real-time, rather than waiting for the entire response to be ready.
You’ll learn how to:
We are following on from Part 1: Getting Started with Laravel & OpenAI and the code from part 1 is available in the ai-agent-tutorial repository on GitHub.
Streaming Responses with Laravel Stream React
The previous example is a good start, but it’s not very useful, it makes the user wait for the response and there is no streaming. Users expect that smooth, word-by-word streaming they get from ChatGPT. Let’s build that.
Create a controller for our chat logic
php artisan make:controller ChatControllerImplement streaming in the controller
Now we’ll create a streaming response that sends AI-generated content to the browser in real-time. This is a significant upgrade from our previous simple example where we used echo to display a complete response all at once.
Laravel’s streamed responses allow us to send data as it becomes available, rather than waiting for the entire response to be ready. We’re using Response::eventStream() which takes a callback function that can yield data multiple times, unlike return which can only send data once and then the function ends.
The key difference: return sends everything at once and stops, while yield sends data piece by piece and keeps the connection alive for more data.
Update app/Http/Controllers/ChatController.php:
<?php

namespace App\Http\Controllers;

use Illuminate\Http\Request;
use OpenAI\Laravel\Facades\OpenAI;
use Illuminate\Support\Facades\Response;

class ChatController extends Controller
{
    public function streamChat(Request $request)
    {
        return Response::eventStream(function () {
            // Create a streamed chat response using OpenAI
            $stream = OpenAI::chat()->createStreamed([
                'model' => 'gpt-4.1-mini',
                'messages' => [
                    ['role' => 'user', 'content' => 'Hello!'],
                ],
            ]);

            foreach ($stream as $response) {
                yield $response->choices[0]->toArray();
            }
        });
    }
}
The key here is Response::eventStream() and OpenAI::chat()->createStreamed(). Laravel handles the server-sent events infrastructure, while OpenAI provides the streaming response. It’s a beautiful partnership.
Update your routes
Update routes/web.php:
We’ve moved the OpenAI streaming logic out of the route definition and into a dedicated controller method.
<?php

use App\Http\Controllers\ChatController;
use Illuminate\Support\Facades\Route;

Route::get('/', [ChatController::class, 'streamChat'])->name('home');
Now you have real-time streaming responses. The magic is starting to happen:
event: update
data: {"index":0,"delta":{"role":"assistant","content":""},"finish_reason":null}

event: update
data: {"index":0,"delta":{"content":"Hello"},"finish_reason":null}

event: update
data: {"index":0,"delta":{"content":"!"},"finish_reason":null}

event: update
data: {"index":0,"delta":{"content":" How"},"finish_reason":null}

event: update
data: {"index":0,"delta":{"content":" can"},"finish_reason":null}

event: update
data: {"index":0,"delta":{"content":" I"},"finish_reason":null}

event: update
data: {"index":0,"delta":{"content":" assist"},"finish_reason":null}

event: update
data: {"index":0,"delta":{"content":" you"},"finish_reason":null}

event: update
data: {"index":0,"delta":{"content":" today"},"finish_reason":null}

event: update
data: {"index":0,"delta":{"content":"?"},"finish_reason":null}

event: update
data: {"index":0,"delta":[],"finish_reason":"stop"}

event: update
data: </stream>
Frontend Integration with React
Backend streaming is only half the story. We need a frontend that can consume these streams and provide a smooth user experience.
Create the React component
Below is a basic React component that will start the server side event stream and consume the streaming response from the backend. We are using the useStream hook to start the stream and the send method to send a message to the backend.
Create resources/js/pages/Chat.tsx:
import { useStream } from "@laravel/stream-react";

function App() {
    const { data, isFetching, isStreaming, send } = useStream("chat");

    const sendMessage = () => {
        send("Hello World!");
    };

    return (
        <div>
            <div>{data}</div>
            {isFetching && <div>Connecting...</div>}
            {isStreaming && <div>Generating...</div>}
            <button onClick={sendMessage}>Send Message</button>
        </div>
    );
}

export default App;
Update routes to serve the React component
We’ve updated the route to serve the React component instead of the chat controller from /.
Update routes/web.php:
<?php

use App\Http\Controllers\ChatController;
use Illuminate\Support\Facades\Route;
use Inertia\Inertia;

Route::get('/', function () {
    return Inertia::render('Chat');
});

Route::post('/chat', [ChatController::class, 'streamChat'])->name('chat');
Handle CSRF for the chat route
The post route is expecting a CSRF token, so we need to update bootstrap/app.php to exclude CSRF validation for our chat endpoint:
<?php

use App\Http\Middleware\HandleAppearance;
use App\Http\Middleware\HandleInertiaRequests;
use Illuminate\Foundation\Application;
use Illuminate\Foundation\Configuration\Exceptions;
use Illuminate\Foundation\Configuration\Middleware;
use Illuminate\Http\Middleware\AddLinkHeadersForPreloadedAssets;

return Application::configure(basePath: dirname(__DIR__))
    ->withRouting(
        web: __DIR__ . '/../routes/web.php',
        commands: __DIR__ . '/../routes/console.php',
        health: '/up',
    )
    ->withMiddleware(function (Middleware $middleware) {
        $middleware->encryptCookies(except: ['appearance', 'sidebar_state']);

        $middleware->web(append: [
            HandleAppearance::class,
            HandleInertiaRequests::class,
            AddLinkHeadersForPreloadedAssets::class,
        ]);

        // NEW: Exclude the chat route from CSRF token validation
        $middleware->validateCsrfTokens(except: [
            'chat',
        ]);
    })
    ->withExceptions(function (Exceptions $exceptions) {
        //
    })->create();
Visit http://localhost:8000 and click “Send Message”. You’ll see the streaming response in real-time. It might look like raw JSON for now, but we’re building up to something much more sophisticated.
Creating a Basic AI Chat Application
Let’s transform our basic streaming example into an actual chat interface where users can send messages and get thoughtful responses using Server-Sent Events (SSE).
Why Server-Sent Events?
Traditional HTTP requests follow a request-response pattern—you ask for something, wait, then get everything back at once. With AI responses that can take 10-30 seconds to generate, this creates a poor user experience.
SSE flips this model: the server can send data whenever it’s ready. For AI applications, this means we can show progress as the model generates each token, keeping users engaged rather than staring at a loading spinner.
The @laravel/stream-react package makes this incredibly simple—it handles the connection management, error recovery, and message parsing automatically.
Update the controller to handle user input
We’re updating the controller to handle user input, this is just a minor change the user message which will now be passed in the request input of message.
Note: We’re starting without persistent storage—each message is a fresh conversation. We’ll add memory later.
Update app/Http/Controllers/ChatController.php:
<?php

namespace App\Http\Controllers;

use Illuminate\Http\Request;
use OpenAI\Laravel\Facades\OpenAI;
use Illuminate\Support\Facades\Response;

class ChatController extends Controller
{
    public function streamChat(Request $request)
    {
        return Response::eventStream(function () use ($request) {
            // Create a streamed chat response using OpenAI
            $stream = OpenAI::chat()->createStreamed([
                'model' => 'gpt-4.1-mini',
                'messages' => [
                    // Include the user's message in the chat
                    ['role' => 'user', 'content' => $request->input('message')],
                ],
            ]);

            foreach ($stream as $response) {
                yield $response->choices[0]->toArray();
            }
        });
    }
}
Switch to GET for SSE
We’re updating the route to use GET for SSE (Server-Sent Events).
Laravel Stream React does not support POST requests for SSE (Server-Sent Events).
Update routes/web.php:
<?php

use App\Http\Controllers\ChatController;
use Illuminate\Support\Facades\Route;
use Inertia\Inertia;

Route::get('/', function () {
    return Inertia::render('Chat');
});

// Update the chat route to use GET for streaming responses
Route::get('/chat', [ChatController::class, 'streamChat'])->name('chat');
Build a proper chat interface
We’re creating a React component that manages multiple “agent” instances—each representing a separate conversation.
This is a significant evolution from our previous simple implementation. Let’s break down what we’ve introduced:
-
useEventStream Hook: This comes from
@laravel/stream-reactand provides seamless Server-Sent Events (SSE) integration. Unlike traditional HTTP requests that wait for a complete response, SSE allows the server to push data to the client in real-time as it becomes available. TheuseEventStreamhook automatically initiates a connection when the component mounts, so we’ve moved it into its ownAgentcomponent. This design lets us create multiple concurrent conversations—eachAgentinstance represents a separate chat thread. -
React State Management: We’re using
useStateto manage the agent’s running state and accumulate streaming responses as they arrive. As each chunk arrives, we append it to ourrunningHistoryarray and update the UI. This creates that familiar ChatGPT-like experience where you see the response being “typed” in real-time.
The setRunningHistory function is used to update the runningHistory state in between renders. It takes the previous state and appends the new content to it. This overcomes the issue of state being only updated when the component re-renders.
setRunningHistory((prev) => {
    const newHistory = [...prev, data.delta.content];
    return newHistory;
});-
Markdown Rendering: The
react-markdownpackage lets us display AI responses with proper formatting, making the chat feel more polished. -
ShadCN UI Components: The Laravel 12 React Starter Kit uses the ShadCN UI components, we’re leveraging pre-built, accessible components (
Button,Card,CardContent,CardHeader,CardTitle) that provide consistent styling and behavior.
Update resources/js/pages/Chat.tsx:
import { Button } from '@/components/ui/button';
import { Card, CardContent, CardHeader, CardTitle } from '@/components/ui/card';
import { useEventStream } from '@laravel/stream-react';
import { Loader2Icon } from 'lucide-react';
import { useState } from 'react';
import Markdown from 'react-markdown';

/**
 * Agent component that handles streaming responses from the server
 * @param message - The user message to send to the agent
 */
function Agent({ message }: { message: string }) {
    // Store the accumulated response content as it streams in
    const [runningHistory, setRunningHistory] = useState<string[]>([]);
    // Track whether the agent is currently processing a request
    const [isRunning, setIsRunning] = useState(false);

    // Set up event stream connection to the Laravel backend
    useEventStream(route('chat', { message }), {
        // Handle stream errors
        onError: (error: Event) => {
            console.error('Error in event stream:', error);
            setIsRunning(false);
        },
        // Handle stream completion
        onComplete: () => {
            setIsRunning(false);
        },
        // Handle incoming messages from the stream
        onMessage: (message: MessageEvent) => {
            setIsRunning(true);
            const data = JSON.parse(message.data);
            console.log('Received message:', data.delta);

            // Append new content to the running history if it exists
            if (data?.delta?.content?.length) {
                setRunningHistory((prev) => {
                    const newHistory = [...prev, data.delta.content];
                    return newHistory;
                });
            }
        },
    });

    return (
        <div className="mt-4">
            {/* Show loading spinner while agent is running */}
            {/* Display the accumulated response with pulse animation while loading */}
            <div className={`prose max-w-none ${isRunning ? 'animate-pulse' : ''}`}>
                <Markdown>{runningHistory.join('')}</Markdown>
                <div>{isRunning && <Loader2Icon className="size-5 animate-spin" />}</div>
            </div>
        </div>
    );
}

/**
 * Main chat component that manages multiple agent conversations
 */
function Chat() {
    // Store all active agent instances
    const [agents, setAgents] = useState<{ id: number; message: string }[]>([]);
    // Counter for generating unique agent IDs
    const [nextId, setNextId] = useState(0);
    // Current user input message
    const [userMessage, setUserMessage] = useState('');

    /**
     * Create a new agent instance with the given message
     * @param message - The message to send to the new agent
     */
    const newAgent = (message: string) => {
        const agentId = nextId;
        setNextId((prev) => prev + 1);
        setAgents((prev) => [...prev, { id: agentId, message }]);
    };

    /**
     * Handle form submission to create a new agent conversation
     */
    const handleFormSubmit = (e: React.FormEvent<HTMLFormElement>) => {
        e.preventDefault();
        newAgent(userMessage);
        setUserMessage(''); // Clear input after sending
    };

    return (
        <div className="container mx-auto p-4">
            <Card>
                <CardHeader>
                    <CardTitle>One Shot Chat</CardTitle>
                </CardHeader>
                <CardContent>
                    {/* Message input form */}
                    <form onSubmit={handleFormSubmit}>
                        <input
                            type="text"
                            value={userMessage}
                            onChange={(e) => setUserMessage(e.target.value)}
                            placeholder="Type your message here..."
                            className="mb-2 w-full border p-2"
                        />
                        <Button type="submit">Send Message</Button>
                    </form>

                    {/* Render all active agent conversations */}
                    {agents.map((agent) => (
                        <Agent key={agent.id} message={agent.message} />
                    ))}
                </CardContent>
            </Card>
        </div>
    );
}

export default Chat;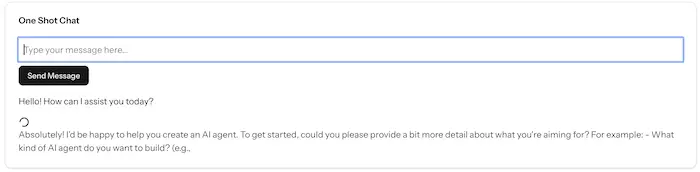
Now you have a functional chat interface! Each message creates a new agent that streams its response in real-time.
The final solution for Part 2 is available in the ai-agent-tutorial repository on GitHub.
Let’s move on to Part 3: Building Custom AI Tools in Laravel & React
Building an Agentic AI Agent Series